# Mocha - JavaScript测试框架
Mocha 是一个功能丰富的 JavaScript 测试框架,可以在 Node.js 和 浏览器中运行,官网链接如下:
- Mocha 官网 (opens new window)
- mochajs/mocha - Github (opens new window)
- Mocha中文网 - 有趣、简单、灵活的javascript测试框架 (opens new window)
这里主要介绍 Node.js 环境下的测试
# 安装
# 全局安装
npm install mocha -g
# 项目内安装
npm install mocha --save-dev
# 开始
在开始之前,要先介绍 Node.js 中的 assert 断言模块。它可以用于判断两个值是否相等、某个值是否为 true 等。比如:
assert.strictEqual(actual, expected[, message])可以判断实际的值 actual 和 期望的值 expected 是否严格相等,如果相等,不做任何操作,否则抛出对应的异常assert.ok(value[, message])判断 value 是否为真值,如果不是抛出异常
let assert = require('assert') // Node.js 内置模块

try {
  let result = assert.strictEqual([1, 2].indexOf(4), 2)
  console.log(result) // 不会执行
} catch(e) {
  console.log(e.message)
  // Expected values to be strictly equal:
  // -1 !== 2
}

try {
  let result = assert.ok([1, 2].indexOf(4) === 2, '值不相等')
  console.log(result) // 不会执行
} catch(e) {
  console.log(e.message)
  // Expected values to be strictly equal:
  // -1 !== 2
  // 值不相等
}
更多 assert 方法参见:assert | Node.js API 文档 (opens new window)
下面来看一个 Mocha 执行的例子
// test/test2.js
let assert = require('assert')

describe('Array', () => {
  describe('#indexOf()', () => {
    it('当 value 不存在时,应该返回 -1', () => {
      assert.strictEqual([1, 2].indexOf(4), -1)
    })
  })
})
使用 npm install mocha -g 全局安装 mocha 后,mocha test2.js 即可运行并测试 test2.js 的代码。如果在项目中直接运行 mocha 命令,会查找 test 目录下的 js 文件运行并测试。
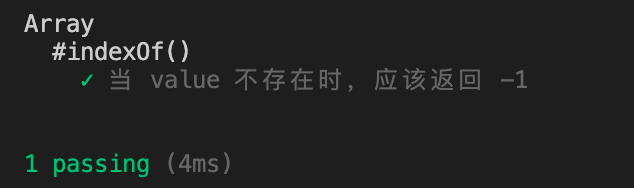
直接使用 node test2.js 是无法执行的,因为不使用 mocha 命令,无法解析代码中的 describe 函数。使用 mocha test2.js 运行上面的例子,结果如下图,会显示验证 pass
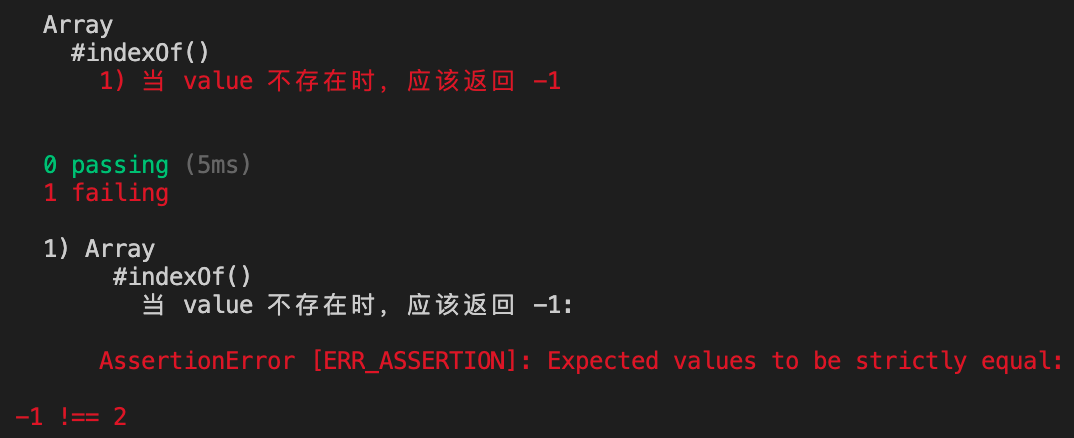
如果将上面例子中的断言替换为错的结果 assert.strictEqual([1, 2].indexOf(4), 2) 运行效果如下图,会显示测试 fail,并给出断言抛出的异常信息
# 断言
上面的例子中,使用的是 Node.js 自带的 assert 断言模块。理论上,只要能够抛出一个错误,Mocha 就能够正常运行,因此也可以使用第三方的断言库,比如
should.js- BDD 风格断言库chai- expect(), assert() and should 风格的断言expect.js- expect() 风格断言better-assert- C 风格的自文档化(self-documenting)的 assert()unexpected- "可扩展的 BDD 断言工具库"
# 异步代码
如果测试内容是异步的,普通的断言判断就会出现问题,来看下面的例子
// async_test.js
let assert = require('assert')

// 需要异步操作才能知道结果的函数
function asyncOpt(cb) {
  setTimeout(() => {
    cb(1 === 2)
  }, 3000)
}

describe('异步测试', () => {
  it('asyncOpt 正确执行应该返回 true', () => {
    asyncOpt((result) => {
      assert.ok(result)
    })
  })
})
mocha async_test.js 执行后,由于没捕获到出错,断言先显示 passing 的结果。后面等异步操作完成后,再执行 assert 触发异常时 mocha 并不能捕获该异常。
对于异步操作的测试,mocha 有两种方式:
1. 在 it() 方法的第二个参数中,使用 callback 作为函数参数,一般命名为 done
// 需要异步操作才能知道结果的函数
function asyncOpt(cb) {
  setTimeout(() => cb(1 === 1), 1500)
}

describe('异步测试', () => {
  it('asyncOpt 正确执行应该返回 true', (done) => {
    asyncOpt((isTrue) => {
      if (isTrue) {
        done() // 测试 pass
      } else {
        done('是错误的值') // 测试 fail
        // 当然也可以是 done(new Error('是错误的值'))
      }
    })
  })
})
在上面的例子中,加了 done 之后,it() 函数不会立即返回测试结果,而是等待用户调用 done() 函数来结束测试。done() 不传任何参数结果就是 pass。如果 调用 done 传了参数,结果就是 fail。done 的参数会在 error 中显示。不需要再调用 assert 断言函数。
WARNING
上面的例子中,如果把 setTimout 的时间改为 3s,则会 fail,因为默认请求下异步操作不能超过 2s,会报如下错误: Error: Timeout of 2000ms exceeded. For async tests and hooks, ensure "done()" is called; if returning a Promise, ensure it resolves.
2. 不使用 done,在 it 回调函数中 return Promise 结果
下面的例子中 it 第二个参数的函数中,return 了一个 Promise,Promise 状态为 fulfilled,测试 pass,状态为 rejected 时,结果为 fail
function asyncOptPromise() {
  return new Promise((resolve, reject) => {
    setTimeout(() => {
      if (1 === 2) {
        resolve()
      } else {
        reject('不相等') // 也可以是 reject(new Error('不相等'))
      }
    }, 1500)
  })
}

describe('异步测试', () => {
  it('asyncOpt 正确执行应该返回 true', () => {
    return asyncOptPromise()
  })
})
这里也可以使用 async/await 来改写上面的例子
describe('异步测试', () => {
  it('asyncOpt 正确执行应该返回 true', async () => {
    await asyncOptPromise()
  })
})
# 同步代码
测试通过代码时,省略 done 回调,Mocha 将自动继续进行下一个测试。下面的例子中使用了 chai 模块的 should、expect 功能。需要先安装 npm install chai --save-dev
var chai = require('chai');
var expect = chai.expect;    // Using Expect style 添加 expect 支持
var should = chai.should();  // Using Should style 添加 should 支持

describe('Array', function() {
  describe('#indexOf()', function() {
    it('当 value 不存在时,应该返回 -1', function() {
      // chai should 断言
      [1, 2, 3].indexOf(5).should.equal(-1);
      [1, 2, 3].indexOf(0).should.equal(-1);
      [1, 2, 3].should.have.length(3);
      'abc'.should.be.a('string');

      // chai expect 断言
      expect([1, 2, 3].length).to.equal(3);
      expect([1, 2, 3]).to.deep.equal([1, 2, 3]);
      expect(undefined).to.be.an('undefined');
      expect(123).to.not.be.an('undefined');
      expect('abc').to.be.an('string');
      expect(2).to.greaterThan(0);
      expect([1, 2, 3]).to.have.lengthOf(3);
    });
  });
});
// pass
# 箭头函数
不建议在 Mocha 中使用箭头函数(ARROW FUNCTIONS),箭头函数会改变 this 指向,导致在 Mocha 函数中无法通过 this 访问 Mocha 上下文。如果不需要使用,也可以使用箭头函数。
let assert = require('assert')
describe('my suite', () => {
  it('my test', () => {
    // TypeError: this.timeout is not a function
    this.timeout(1000);
    assert.ok(true);
  });
});
# 钩子函数(HOOKS)
Mocha 提供了 4 个钩子函数 before(), after(), beforeEach(), 和 afterEach(). 用于在测试前做一些准备工作或者在测试后做一些清除操作。
describe('hooks测试', function() {
  // 第一个测试进行之前执行一次该方法
  before(function() {
    // runs once before the first test in this block
  });

  // 最后一个测试执行之后,执行一次该方法
  after(function() {
    // runs once after the last test in this block
  });

  // 所有测试开始之前都需要执行一次该方法
  beforeEach(function() {
    // runs before each test in this block
  });

  // 所有测试结束之后都需要执行一次该方法
  afterEach(function() {
    // runs after each test in this block
  });

  // test cases
});
下面来看一个实际例子,在测试栈的实现时使用 beforeEach 在每个测试时,都初始化一个新的栈对象,防止上一次的测试结果,对下一次的测试结果有影响
describe('StackArray', () => {
  let stack;

  // 每次测试前,都使用一个新的 StackArray 对象
  beforeEach(() => {
    stack = new StackArray();
  });

  it('starts empty', () => {
    expect(stack.size()).to.equal(0);
    expect(stack.isEmpty()).to.equal(true);
  });

  it('pushes elements', () => {
    stack.push(1);
    expect(stack.size()).to.equal(1);
    stack.push(2);
    expect(stack.size()).to.equal(2);
    stack.push(3);
    expect(stack.size()).to.equal(3);

    expect(stack.isEmpty()).to.equal(false);
  });

  it('pops elements', () => {
    stack.push(1);
    stack.push(2);
    stack.push(3);

    expect(stack.pop()).to.equal(3);
    expect(stack.pop()).to.equal(2);
    expect(stack.pop()).to.equal(1);
    expect(stack.pop()).to.equal(undefined);
  });
}
这些 hooks 支持一些描述,方便错误调试
beforeEach(function namedFun() {
  // beforeEach:namedFun
});

beforeEach('some description', function() {
  // beforeEach:some description
});
beforeEach(function () {
  // beforeEach hook
});
对于异步的钩子,可以使用 done、return Promise 的方式来处理异步
# 待测试
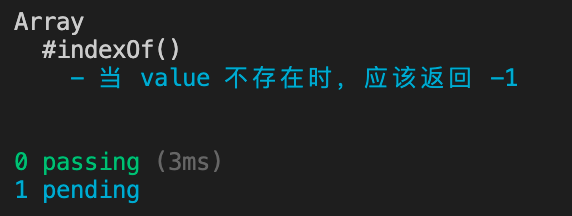
对于待测试的,可以在 it() 方法中不传回调函数
describe('Array', () => {
  describe('#indexOf()', () => {
    it('当 value 不存在时,应该返回 -1')
  })
})
效果如下图
# only() 与 skip()
describe 与 it 均支持 .only() 与 .skip() 方法,用于仅执行该测试,或者跳过某个测试
describe('Array', function() {
  describe.only('#indexOf()', function() {
    it.only('should return -1 unless present', function() {
      // this test will be run
    });

    it('should return the index when present', function() {
      // this test will not be run
    });
  });
});

describe('Array', function() {
  describe('#indexOf()', function() {
    it.skip('should return -1 unless present', function() {
      // this test will not be run
    });

    it('should return the index when present', function() {
      // this test will be run
    });
  });
});
# 重试测试
测试一次不成功时,可以重试该测试
describe('retries', function() {
  // Retry all tests in this suite up to 4 times
  this.retries(4);

  beforeEach(function() {
    browser.get('http://www.yahoo.com');
  });

  it('should succeed on the 3rd try', function() {
    // Specify this test to only retry up to 2 times
    this.retries(2);
    expect($('.foo').isDisplayed()).to.eventually.be.true;
  });
});
# 动态生成测试
可以通过 forEach 根据配置动态的生成 it 测试函数
var assert = require('chai').assert;

function add() {
  return Array.prototype.slice.call(arguments).reduce(function(prev, curr) {
    return prev + curr;
  }, 0);
}

describe('add()', function() {
  var tests = [
    {args: [1, 2], expected: 3},
    {args: [1, 2, 3], expected: 6},
    {args: [1, 2, 3, 4], expected: 10}
  ];

  tests.forEach(function(test) {
    it('correctly adds ' + test.args.length + ' args', function() {
      var res = add.apply(null, test.args);
      assert.equal(res, test.expected);
    });
  });
});
# 测试耗时、设置超时时间
测试耗时分为三个级别:fast(绿色)、normal(黄色)、slow(红色)。默认超时时间是 2s,可以使用 this.timeout() 修改当前测试的超时时间。注意不要使用箭头函数,否则无法调用 this.timeout() 方法。
- this.timeout(5000) 将超时时间设置为 5s,这样就不会有 2s 的限制了
- this.timeout(1000) 对于性能要求较高的场景,可以限制超时时间为 1s
function asyncOptPromise() {
  return new Promise((resolve, reject) => {
    setTimeout(() => {
      if (1 === 2) {
        resolve()
      } else {
        reject('不相等') // 也可以是 reject(new Error('不相等'))
      }
    }, 3000)
  })
}

describe('异步测试', function () {
  it('asyncOpt 正确执行应该返回 true', async function() {
    this.timeout(5000); // 设置超时时间为 5s
    // this.timeout(1000);
    await asyncOptPromise()
  })
})
一般在测试通过时,会显示耗时,如果是普通或慢,会标记黄色或红色。默认 50ms 左右是普通标黄色,我们可以手动指定多少毫秒算慢的。比如 this.slow(2000) 那么 50ms 就是快了。当然也可以使用 this.slow(50),将 50ms 耗时设置为慢,标记为红色。
# 更多内容
以上介绍了 Mocha 在 Node.js 中的基本用法,更多内容请参考官方文档